

When Lincoln decided to throw a Minecraft-themed birthday bash, Gabby and I were totally up for the adventure. As always with us, what starts as a simple idea somehow morphs quickly, and this time it involved switching from a laser printer to a wide format inkjet printer (an Epson EcoTank ET-8550, to be precise). Why, you ask? Well, let’s dive into our world of DIY birthday preparations!
Firstly, why did we switch from a laser printer to a wide format inkjet printer? A wide format laser is way too pricey and absolutely gigantic which could noway fit into the configuration of our home. Plus, there’s an entire line of materials made for creative small businesses to print at home. No need for a fleet of machines to complete our jobs!
What really sold us on switching from laser to inkjet? Border-less printing magic! Laser printers just don’t have the ability to print border-less which also meant pulling out the scissors or guillotine style paper cutter. That was always such a painful addition of time to any project.
Other than a little proofreading and design discussions, I didn’t have a lot to do with the invitation and Gabby handled all of the design work. Typically when we printed birthday invitations they were printed on a laser printer, so we had paper on hand for that type of printer. Of course when printing on an inkjet printer, the paper just absorbs the ink, so the entire invitation was kind of dull and lacked the excitement of the design. Since we were on a timeline to get these done and handed out, it was off to Office Depot for some thick photo paper that would bring out the vibrant colors of the design.
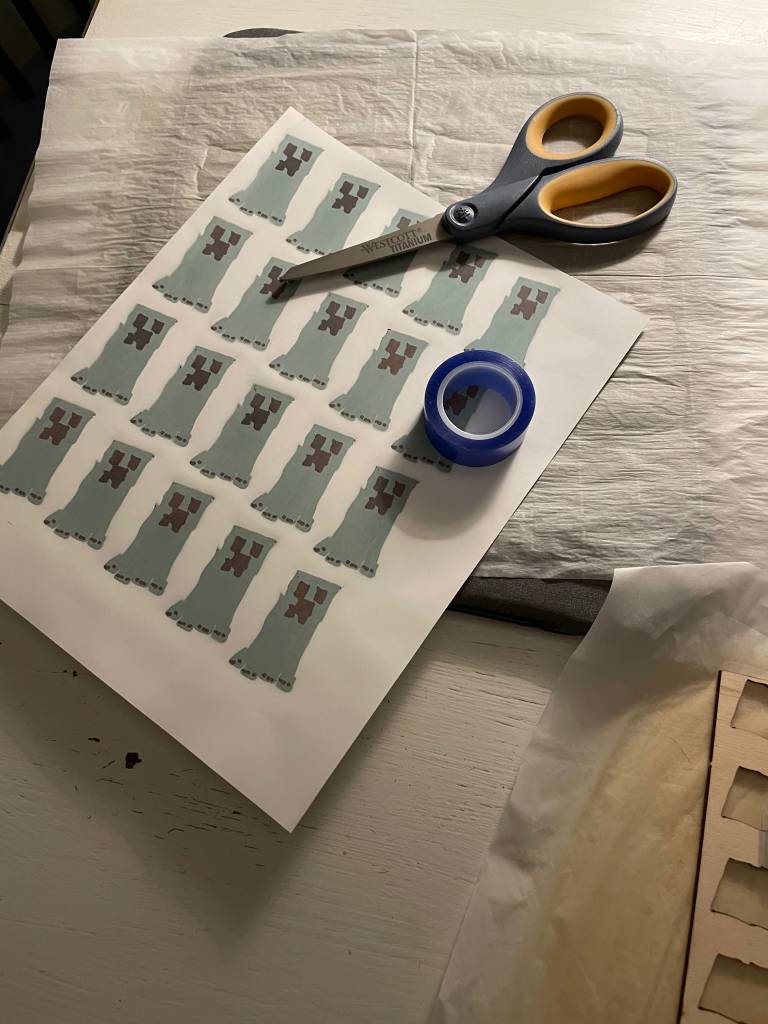
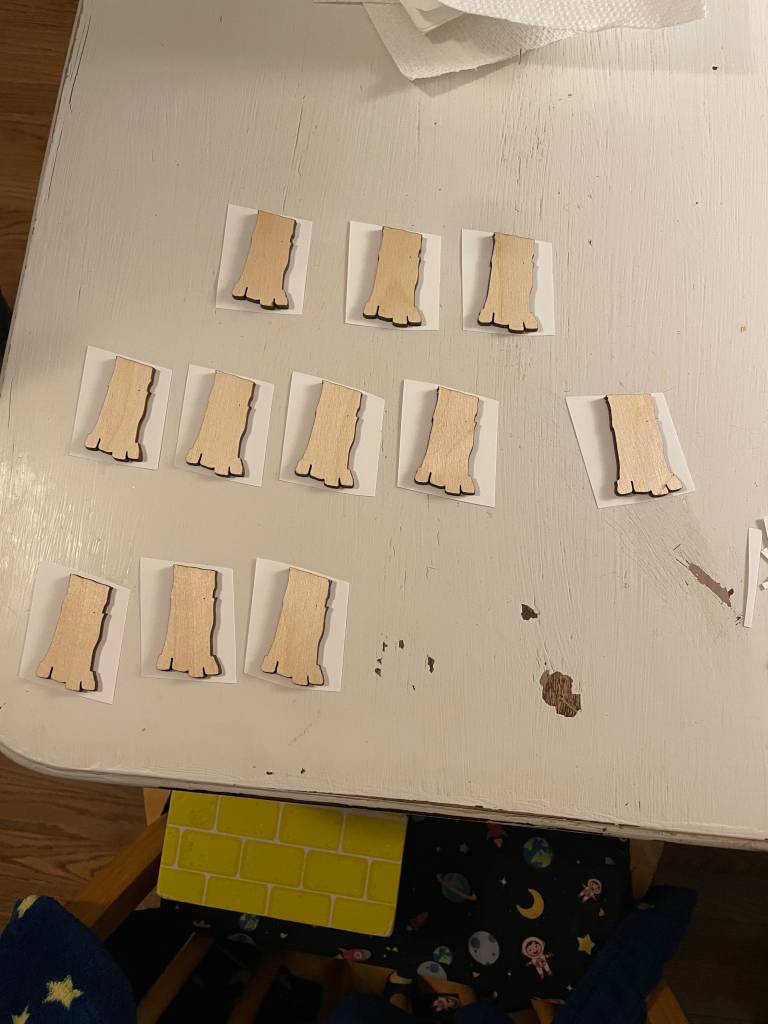
In the middle of all of this, I had decided that I wanted to try out a new technique with our Glowforge. I have seen that you can cut out a design on the Glowforge, and then use sublimation to adhere the design to the piece of wood that was cut out. We make shirts all of the time for our boys, so I thought that it wouldn’t be too difficult. I wanted to do the test while Gabby was away and surprise her when she got back. The one thing that I didn’t really consider was my Adobe Illustrator skills. I opened up the file that Gabby had made, and started to do my best at manipulating her file to work on the Glowforge. Finally after about 30 minutes I had the design ready and I was able to cut it out, and about an hour after I started I had 4 creepers cut out of 1/8″ plywood and sublimated with the design. This is just too cool!!!
The next step was to finally get actual invitations printed. Simple enough with the new paper in hand, or so we thought. Printing border-less was very different from printing and cutting. The machine wants to zoom in on the picture to have the bleed that it needs to print. This caused an issue, because the original design wasn’t made to have a bleed incorporated, so Gabby went back to the design to update it and finally we had an invitation printed and ready.
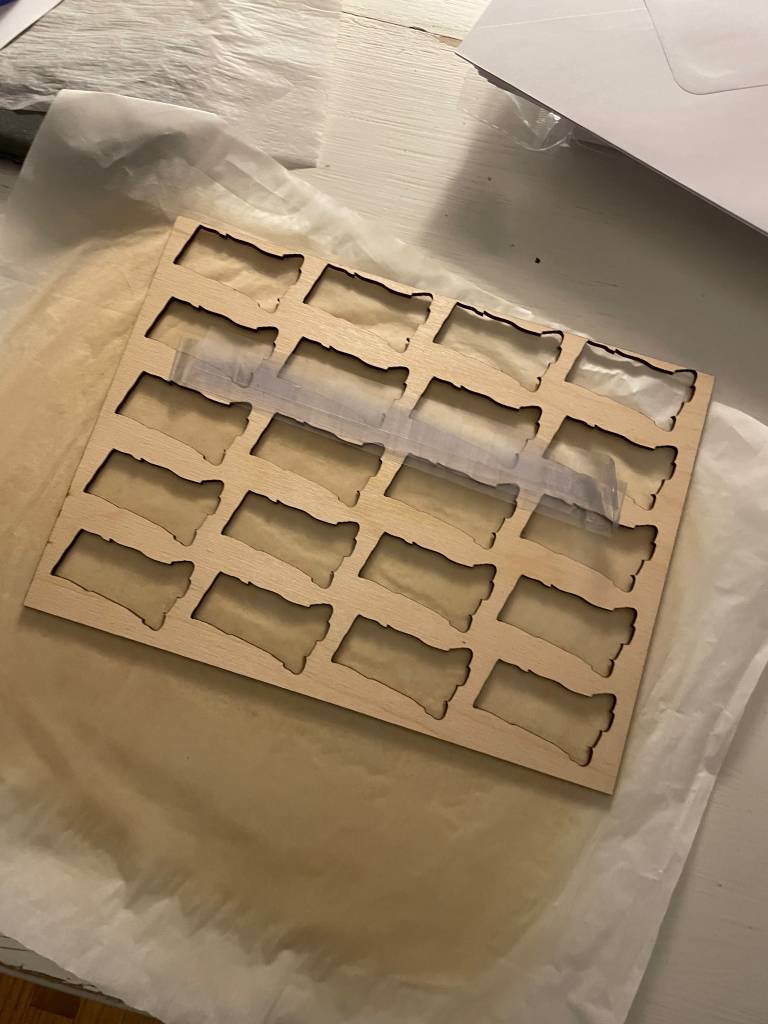
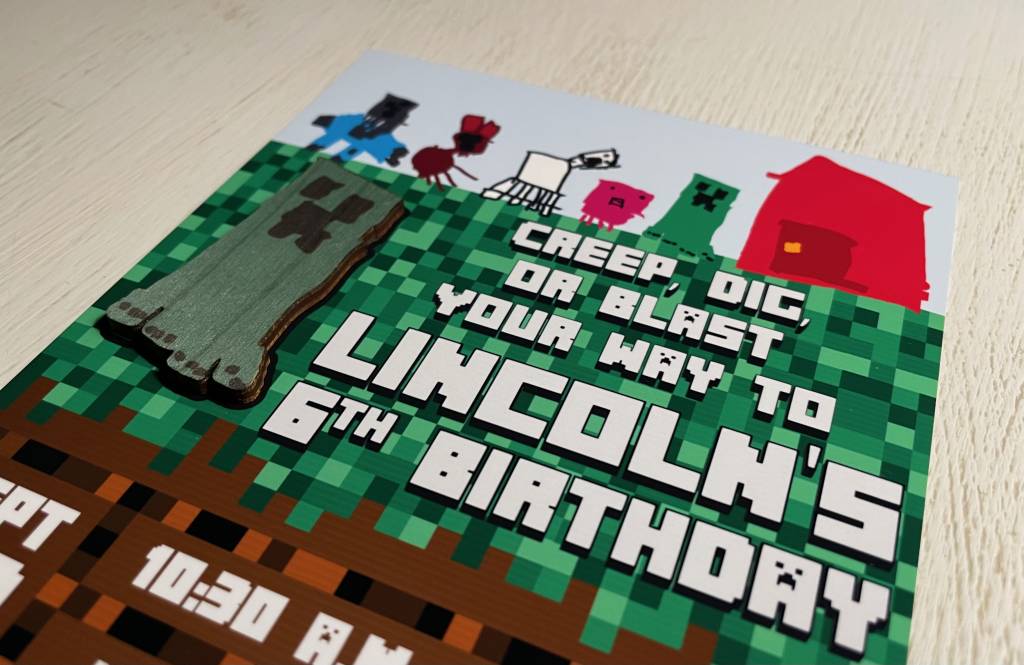
Now we just have to adhere the wooden creepers to the invitation and voila a magical Minecraft invitation with a custom designed creeper leading the show. Well that was the plan and in the middle of updating the invitation, the size of the creeper grew, so the 20 creepers that were already cut and sublimated were too small for the invitation. Luckily, Gabby is truly amazing with illustrator, so after about 5 minutes she had an svg file ready for me to cut with the Glowforge. We were also able to align this with the sublimation sheet, so we taped the wooden creepers to the sublimation sheet and pressed with the heat press to finish the product. In the end, it wasn’t too bad considering all of the processes hadn’t been tried by us yet, and we got an amazing invitation for Lincoln to hand out.
Lessons learned:
- Finalize the design before doing next steps.
- Doing something new will always take more time, and doing multiple new things will take even longer.
- Let the expert do the work in illustrator.
2 Comments
Lori
This is amazing!
Justin
Thank you!!! We love hearing feedback.